What is the function of a garage? Some people might use it as the parking area only. Others, on the other hand, find a lot more creative things that could be done in the garage. As a results, tools and useful items are piling up. If you are one of them, then it is the perfect time to build garage shelves by yourself. The steps are easy, the materials are cheap and the result is superb!
Read also: DIY GARAGE SHELVES ORGANIZING IDEAS
1. Grab the Supplies
The most important item for building a shelf is the lumber. For a small to medium size shelves, the 2×4 lumber is good enough. Make sure to buy just enough, so there is no leftover. This lumber will be used as the frame material. Next, you also need several plywood boards.
Don’t forget to collect the stud finder, impact driver, power drill, self-taping screws, and tools to tighten screws. You will need them to attach the frame and the plywood to the wall. Without them, it would be a hard work especially when you do the project alone. You also need speed square and level to check the setting of the shelves. A miter saw would be useful to cut excessive length.
2. Measuring the Available Space
First thing to do is measuring the height and width of the wall. You should know how big the shelves should be, finding the suitable size to accommodate all the clutters. It is recommended to get the exact measurement, so use the measuring tape. You also want to plan how many rows should be added to the shelves.
Draw a sketch to get clearer picture. It is the time to plan the storage options as well. It helps to determine the height of each row. If you make narrow rows, then the big storage cannot fit well. Remember: the shelves should help with decluttering. When you are not sure enough, the best solution is reading self-help tips on the internet.

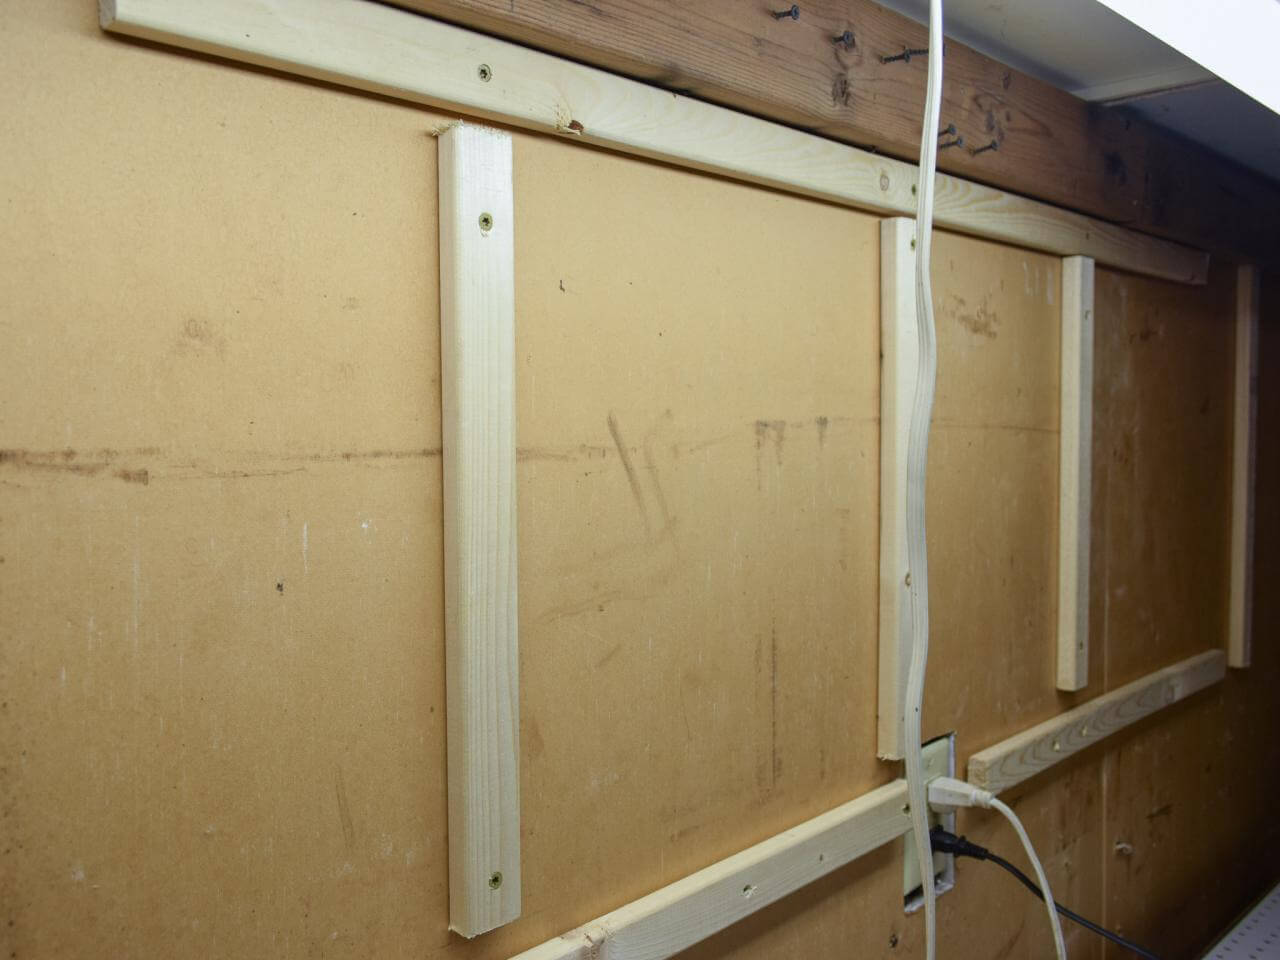
3. Attach the Studs
Now that you have the shelves sketch on your hand, it is time for the real work. Mark the spots where the frame will be attached to the walls. You need to attach the studs; it acts as the base to hold the whole frame. Grab the drill and start from the middle spot. Once you attached the frame lumber, use level to see whether the setting is proper. Then, move towards both ends.
Some of you might have partners to hold another side of the lumber. Those who work alone should think smarter: glue one side temporarily to the wall using self-taping screw. Once you are done with one side, another end won’t require any adjustment.

4. Install the Supporting Boards
A shelf won’t be completed without the identical frame on each row. Believe it or not, you could spend a lot of time in this stage. To cut the time, try to work smart. Clamp another 2×4 horizontal lumber frame to each end of the stud. You might also use screw, but do it only on both ends. Choose the easier one for you.
Grab the vertical lumber frame and attach it to both ends. If the empty space in the middle is too wide, you might need another horizontal frame to support the weight. After finishing this step, release the clamp or the screws on the stud. You get one set of shelf frame. Repeat the process to all rows.
5. Add Cleats for Maximum Weight Support
If you plan to put on heavy items on top of the shelves, you might want to add cleat. It helps the shelves to hold the weight, preventing the frame to snap from its wall installation. For the 24 inches shelves, the cleat should be 21 inches. It will be installed on the longer side of the shelves.
To attach the cleat, use the tools to drill pocket holes. Take one screw and drill it into the holes. The size of each screw is three inches for 2×4 lumber frame. You might need bigger screws if the lumbers are thicker. Make sure the screw is drilled properly.

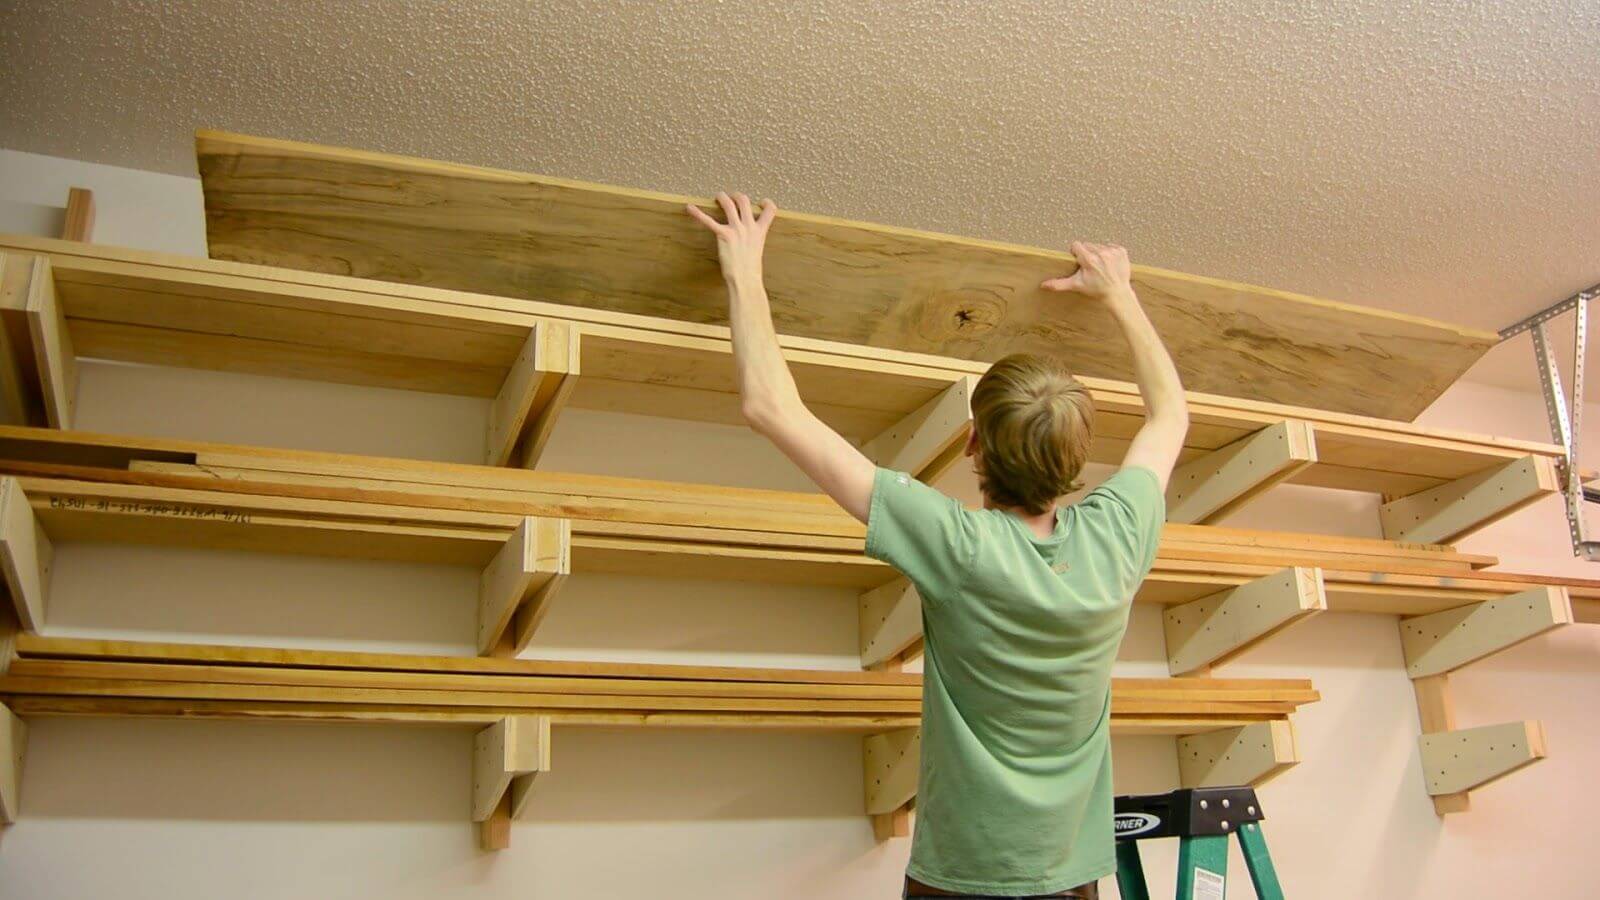
6. Slide in the Plywood Shelves
You are almost finished! The frames look like a proper shelf. One thing is missing: the plywood. The standard size for garage shelves is half inch plywood. The width and height should be matched to the frame. Usually, the plywood is sold as one big sheet. You need a strong cutter to shape it.
This is where your cutting tools play its role. Unless you are confident and experienced to use the tool, a helping line will make a big difference. It shows you the path to cut the plywood and minimizes wrong cut. Now slide in the plywood to the shelf rows.

7. Other Shelving Ideas
The point of building a shelf in a garage is providing extra space to keep essential items. Some of you might have different items to store and the big shelf plan doesn’t really help. In this case, you should find another reference of garage storage. Once again, mind the items that will be stored in the shelf.
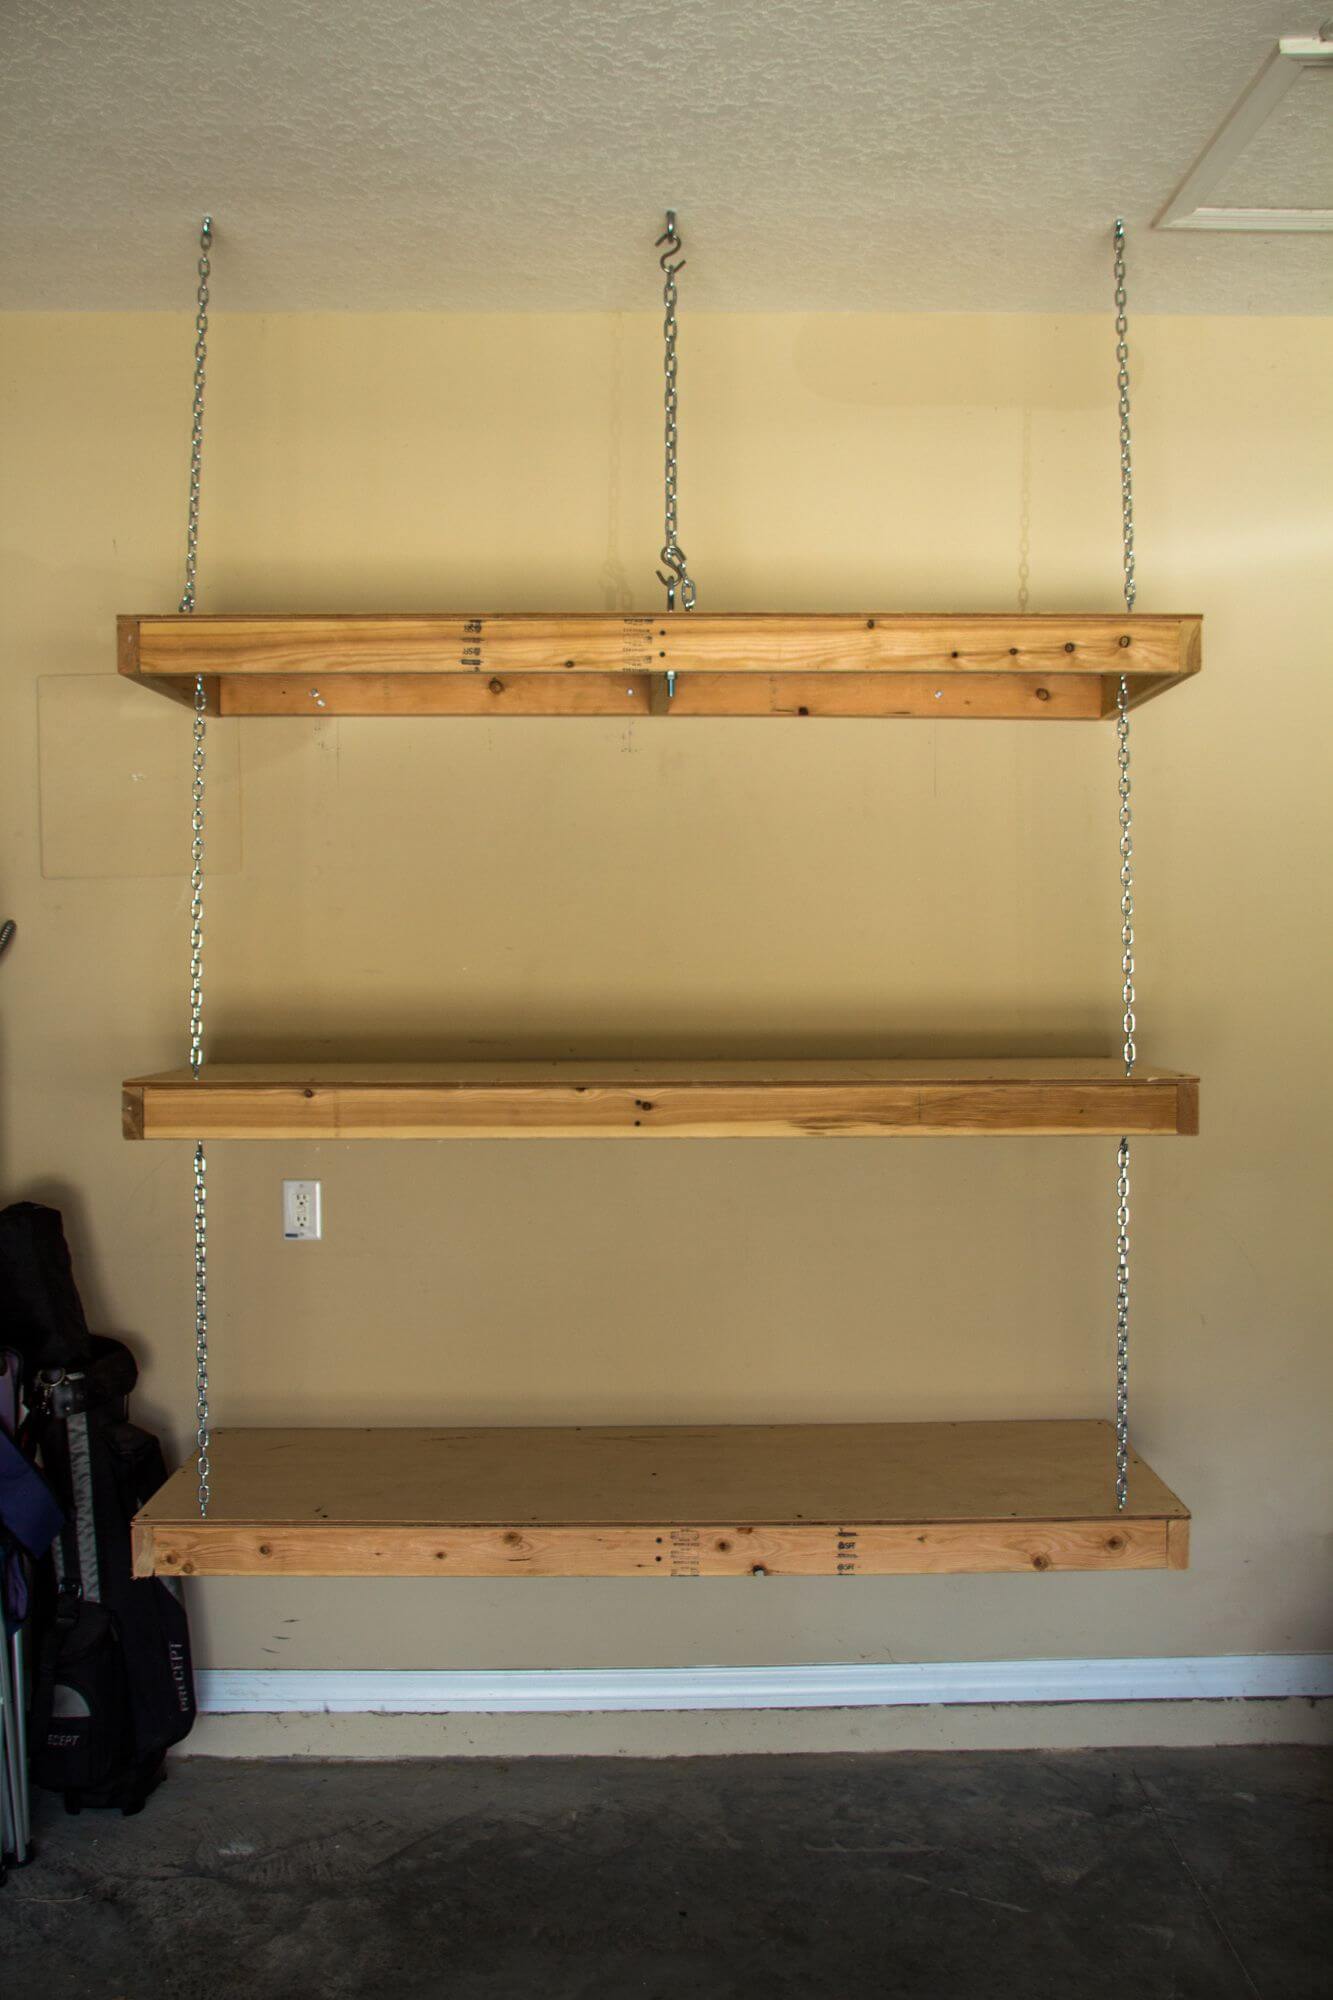
a. Chain-Hooked Shelf
Some garages only have limited space, so there is no empty wall for the shelves. In this case, you might want to look up. The are above the door garage or above the bicycle parking area could be an option. You will need even less material: only thick lumber frame and a chain. Install the lumber on the wall, then attach it to the chain. Drill the other ends of the chains to the wall as well.
b. Storage and Hooks
In addition to the storage, you also need hooks to arrange the tools. It is possible to create a shelf for this purpose. You need to attach a board to the upper walls. Don’t forget to attach triangle-shaped wood for support. To make things neat, install a stud under the shelf and add several hooks.

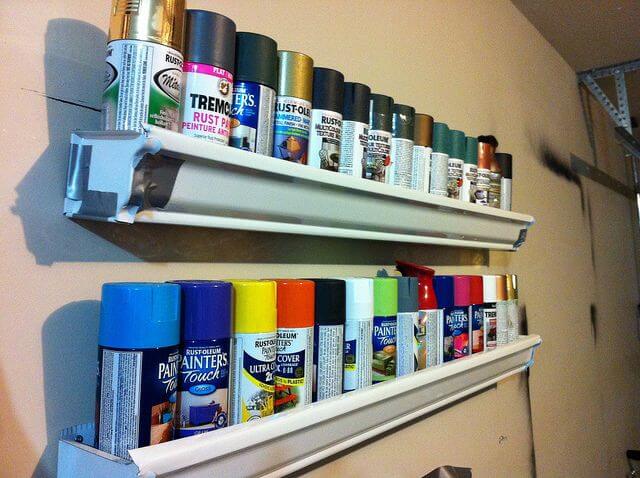
c. Gutter Mini Shelf
People might imagine a huge shelf, but you want a small one to store the cans, sprays and other micro items. Try to be creative and reuse gutter as a shelf. It is really simple. You only need small frame created from the lumber. Attach this frame to the wall. Glue or screw the gutter to the frame.